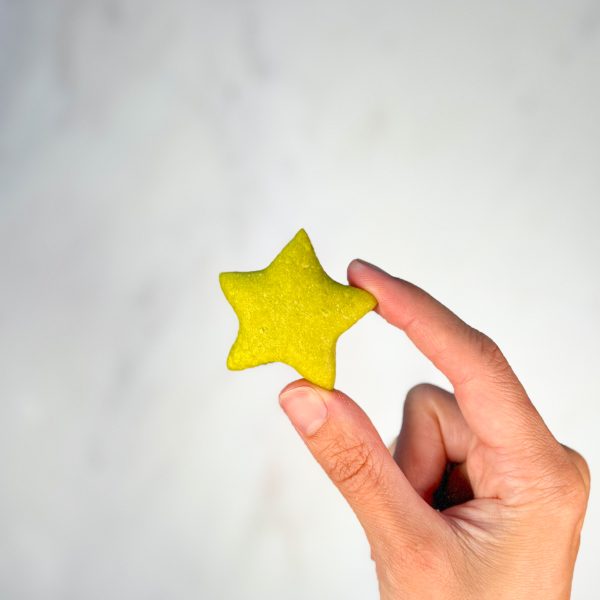
Avocado Biscuits 🥑
Soft avocado biscuits made with just three simple ingredients. They’re easy for little hands to hold and make a simple finger-food option when baked until tender rather than crunchy.
These Avocado Biscuits combine ripe avocado, flour and unsalted butter to create a simple homemade finger food with a soft, tender texture.
Avocado naturally adds moisture and fat to the dough, helping keep the inside tender without needing added sugar.
For babies, these should be baked only until fully cooked but still soft. Do not serve biscuits that have become hard, dry, crunchy or difficult to squash between your fingers.
Why You’ll Love Them
- Made with just three main ingredients
- No added sugar
- No added salt
- Egg-free
- Vegetarian
- Avocado adds natural moisture and fat
- Easy to make in different shapes
- Freezer-friendly
Nutritional Benefits
- Avocado: Provides unsaturated fats, fiber, potassium and several vitamins and minerals.
- Flour: Provides carbohydrates for energy. Wheat or spelt flour also contributes some protein.
- Unsalted Butter: Adds fat and moisture and helps create a tender texture.
Baby Safety Notes
- Age: Recommended from around 9 months for babies who are developmentally ready for textured finger foods.
- Why 9 Months+: Biscuits can become hard or dry when baked. For younger babies, softer foods are easier to manage. These biscuits must remain tender and easy to break apart.
- Texture Test: Once cooled, press the biscuit firmly between your thumb and finger. It should squash, crumble softly or break apart easily without requiring significant force.
- Do Not Serve: Do not offer biscuits that are hard, crisp, dry, tough or difficult to break apart.
- Wheat: This recipe contains wheat and gluten when made with regular or spelt flour.
- Dairy: Regular butter contains milk. Milk products can be introduced from around 6 months as part of complementary feeding.
- Allergens: Wheat and milk are common allergens. If either is new to your baby, introduce new allergens individually and in small amounts so a reaction is easier to identify.
- Salt: Use unsalted butter and do not add salt to the baby’s portion.
- Always have your baby seated upright and supervise closely while eating.
How to Serve by Age
- 9–12 Months: Instead of very small cookie shapes, make larger oblong or finger-shaped biscuits that are easy to grasp. Keep them thick enough to remain soft inside.
- 12–18 Months: Serve a soft biscuit whole or break it into manageable pieces according to your child’s eating skills.
- 18 Months+: Serve as soft biscuits alongside fruit, yogurt or another age-appropriate food.
Babies under 12 months generally do not need a separate snack time. These can be served as part of a meal or alongside other complementary foods.
Ingredients
- 200 g ripe avocado, peeled and stone removed
- 190 g self-raising flour
- 40 g unsalted butter, melted
Homemade Self-Raising Flour
If you don’t have self-raising flour, combine:
- 190 g plain all-purpose flour or white spelt flour
- 2 tsp baking powder
Mix thoroughly before adding it to the dough.
Recipe Tips
- Avocado: Use a very ripe, soft avocado so it mashes completely into the dough.
- Dough: The dough should be soft and easy to handle without being excessively sticky.
- Extra Flour: If necessary, add only a very small amount of additional flour. Too much flour can make the biscuits dry and hard.
- Thickness: For babies, keep the dough around 0.5–0.75 cm thick rather than rolling it extremely thin.
- Shape: For younger babies, larger finger-shaped biscuits are easier to grasp than tiny shapes.
- Baking: Do not bake until crisp. The goal is fully cooked but soft and tender.
- Dairy-Free: You can use a suitable unsalted dairy-free butter alternative. Check the ingredient label for allergens and added salt.
Directions
- Preheat the oven to 350°F (180°C) and line a baking tray with parchment paper.
- Place the ripe avocado in a large mixing bowl and mash thoroughly with a fork until smooth.
- Add the melted unsalted butter and stir until combined.
- Add the self-raising flour gradually. Mix first with a spoon and then gently bring the mixture together with your hands until a soft dough forms.
- If the dough is very sticky, add only a small amount of additional flour. Avoid adding too much, as this can make the biscuits dry.
- Place the dough on a lightly floured surface or between sheets of parchment paper.
- Gently roll the dough to approximately 0.5–0.75 cm thick.
- Cut into shapes. For babies around 9–12 months, larger finger-shaped pieces are preferable to very small cookie shapes.
- Transfer the biscuits to the prepared tray.
- Bake for approximately 15–20 minutes, checking them early.
- Remove them once they are fully cooked and lightly set. Do not bake until dark, dry or crunchy when serving to a baby.
- Allow the biscuits to cool completely.
- Before serving, perform the texture test: the biscuit should squash or break apart easily between your fingers.
- Serve in an age-appropriate shape and enjoy!
Storage
- Refrigerator: Once completely cooled, place the biscuits in an airtight container and refrigerate for up to 2 days.
- Freezer: Freeze cooled biscuits in a freezer-safe container or bag for up to 2 months for best quality.
- Thawing: Transfer frozen biscuits to the refrigerator and allow them to thaw overnight.
- Reheating: If desired, warm gently. Avoid reheating until crispy or dry.
- Before Serving: Allow to cool to a safe temperature and always check the texture again. The biscuit should remain soft and easy to break apart.
Loved this recipe? Click the image below and check out my eBooks 📚💚